
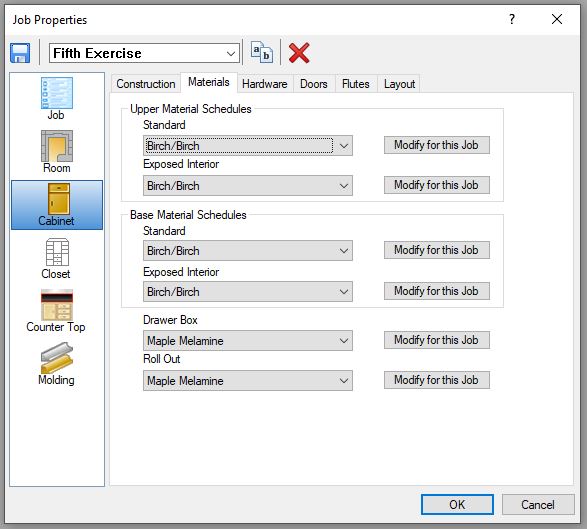
1. Start a new Job. On the Job Properties screen, on the "Materials" tab, select a Material Schedule that is using a board stock Material for the part called "Board".
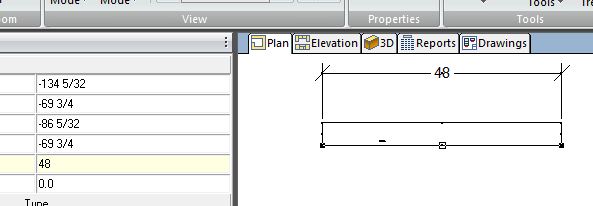
2. Draw a wall, 48 inches long is good enough.
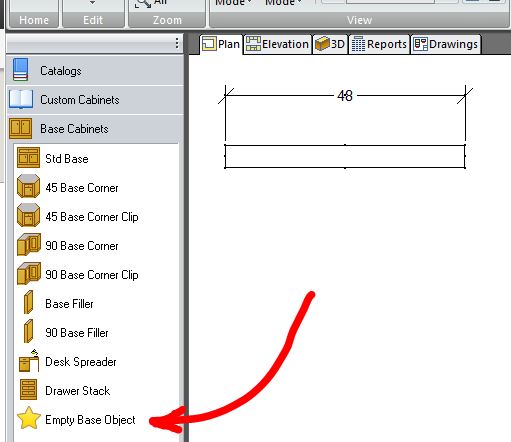
3. Place the "Empty Base Object" on the wall. You can find the "Empty Base Object" in the Custom Cabinet catalog under Bases.
If you don't have the "Empty Base Object":
a. Place a standard base cabinet on the Wall.
b. Right click on it and select "Edit".
c. Click on the "Section Face" tab and then click on "Modifications" and "Default Assembly", answer "Yes" when you get the warning.
d. Click on "Parts" and then "Delete Parts", check "All Parts" and click on "OK".
e. Click on the "Return" option until it will not go any more.
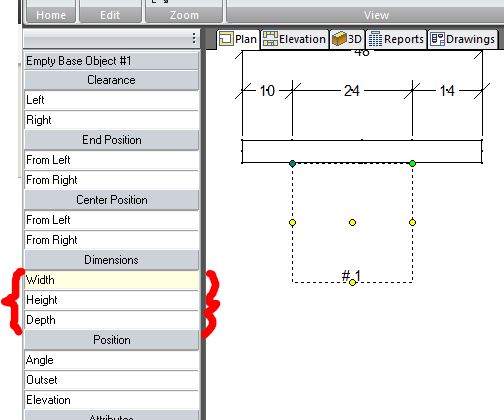
4. Click on the Empty Base Object and size it to 2.5 inches wide, 12 inches high, and 12 inches deep.
5. Right click on the Empty Base Object and select "Edit". Look at the base object from the different ortho views. You will see that you don’t have any parts. All your screen shows is an empty cabinet 2.5"W, 12"H, and 12"D.
6. Click on a Face ortho view.

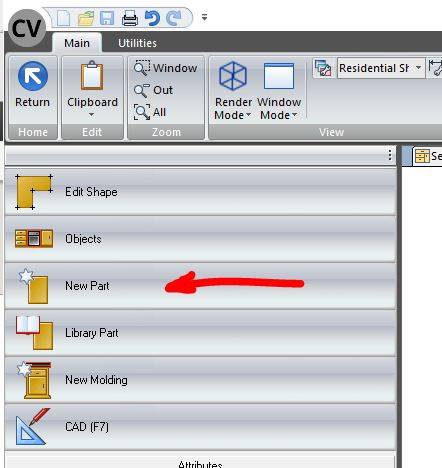
7. Click on "New Part", we will add the top piece first.
8. In the "Part Type" area select "Board" as the part type then click "Next". Note Under the "Material" area it should have a material listed that is 3/4" thick.
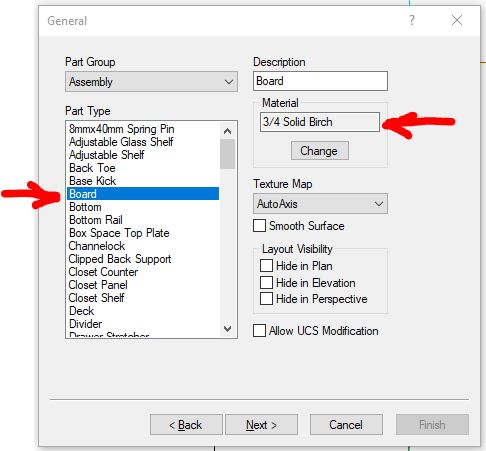
If not DO NOT click on "Change". Changing the material here instead of in your material schedule will "Lock" the material to always use the material you select here. If you later changed the material schedule expecting the material for this board to change with the material schedule it would not change. Stop now, exit the job, go to your material catalog, click on "Schedule" at the top of the screen, then select "Cabinet Parts". When the "Setup Material Schedule" screen comes up, select one of your material schedules to work on. Click on the Plus (+) in front of "Face" to open it then click on the plus (+) in front of "Face Frame". Select a material for "Board" that is 3/4" thick. Then start over from step #1 or you could reopen this job and use the "Update Materials" option. When you get to the "Job Properties" screen be sure to go to the "Materials" tab and select the material schedule that you worked on.
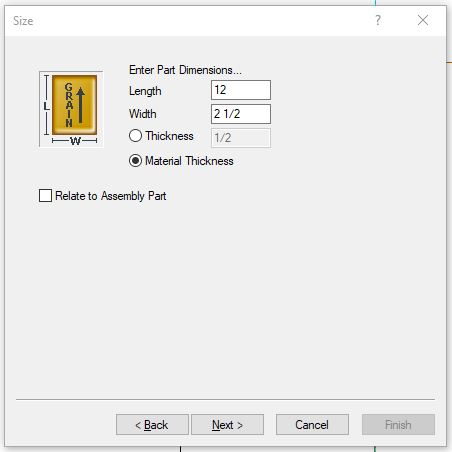
9. In the "Size" window set the size of this part to 12"L and 2.5"W, leave the thickness alone. This part is the top piece and its length will be what ever the depth of the
cabinet is in this case 12". The width of this part is the same as the width of the cabinet in this case 2.5". Click on "Next".
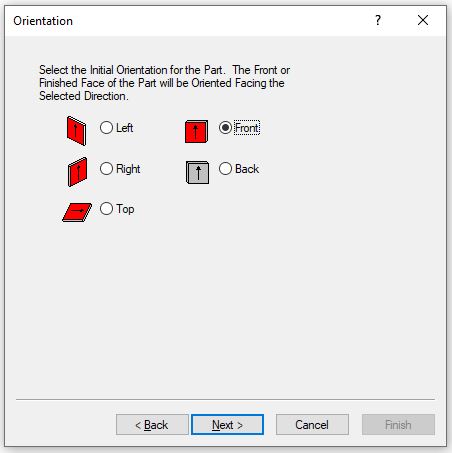
10. In the "Orientation" window leave the orientation set to "Front". Click on "Next".
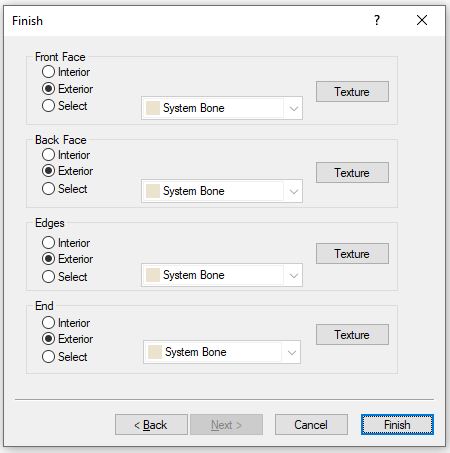
11. In the "Finish" window set the finish to "Exterior" for the front, back, and edges. Click on the "Finish" button.
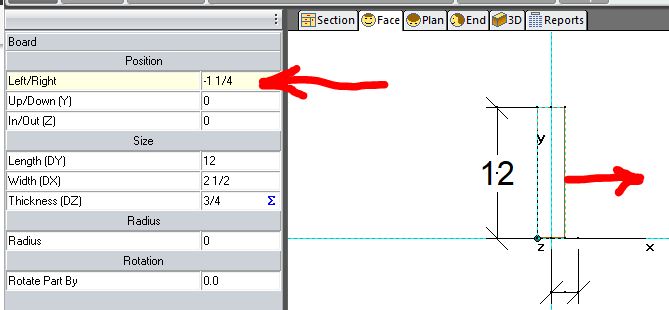
You will now be at a front ortho view and on the left side of your screen the "Left/Right" will be "-1.25 inches".
12. Set the "Left/Right" to 0 inches and press enter. This will move the part so that it is inside of the empty cabinet.
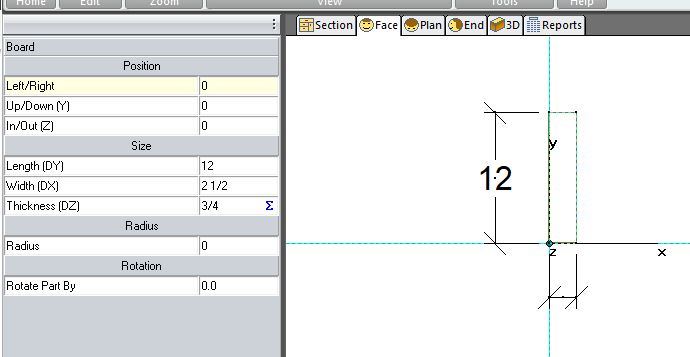
This part is going to be the top piece of our corbel so we are going to have to lay it face down and then raise it up to the top of the empty cabinet. If you click on this part from different ortho views you can see that the reference point is in the left, bottom, and back corner. In order to lay this piece face down it is the X-axis that is going to act like a hinge. In order to face the reference point we will need to view the part from a "Right" ortho view.
13. Click on the "End" ortho view tab.
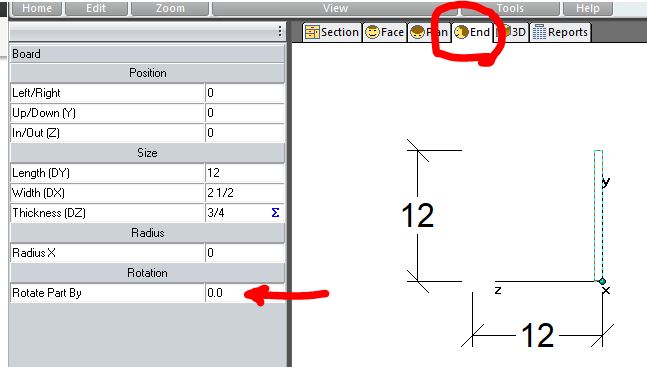
We want to lay this part face down and to do that we will need to rotate it "counter clockwise". To rotate it counter clockwise we will
need to enter a positive amount. See "Positive (+) and Negative (-) Rotation". Click on the part and enter +90 in the "Rotation" area, you must press enter after entering the
+90.
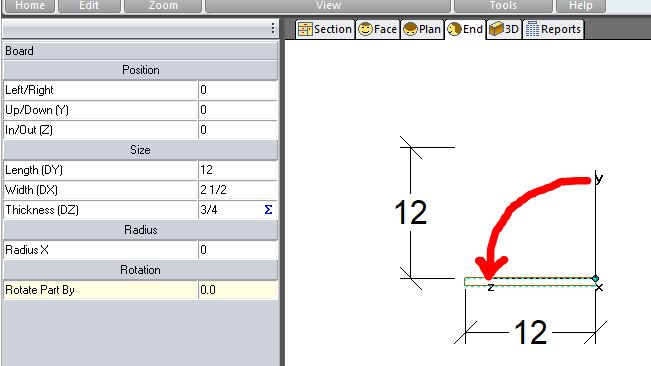
As you can see the reference point is now on top of the part. And the part is below the empty cabinet. In order to raise the part to the top of the empty cabinet we will need to enter 12" in the "Up/Down" area.
14. Enter 12 in the "Up/Down" area and press enter.
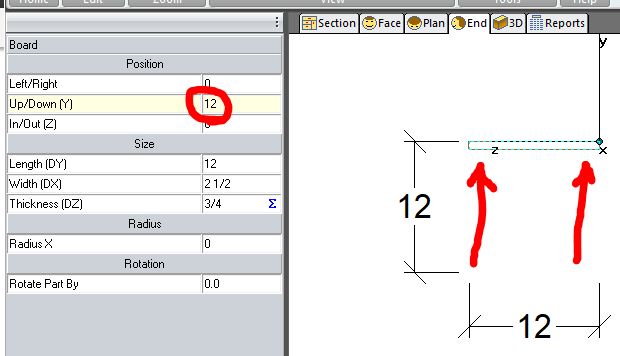
This part is now rotated and positioned correctly so we will now add the back piece.
Add new comment